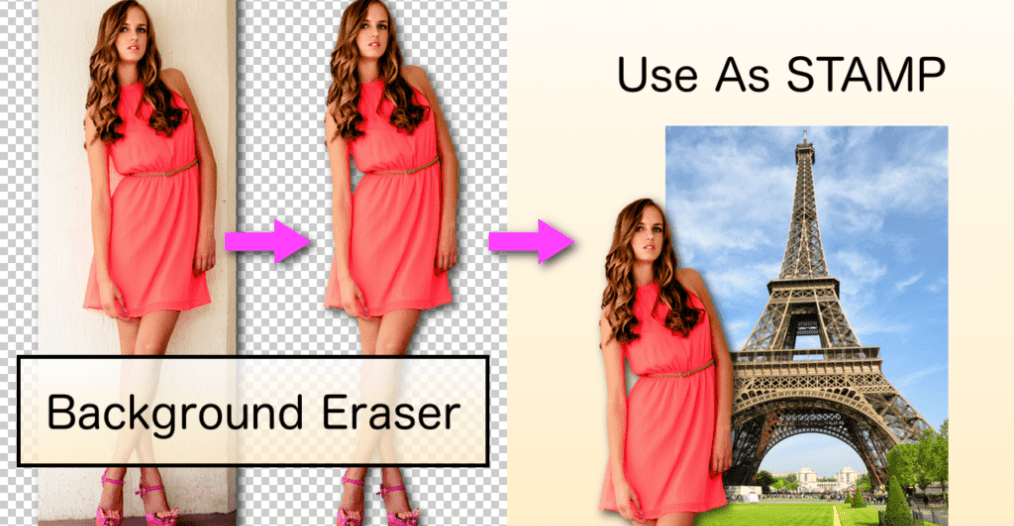
Background Eraser App Download Free
Background Eraser app
Background eraser app:- You go to the bust and take a lot of photos there. Sharing these fates with a college is quite easy. But some photos are like this, in which unwanted people and things come in the background of your photo. Now, what will you do to remove this unwanted background from these photos?
At such times, you will save these photos on your PC and try to delete the background by using the image editor like Photoshop. But this is not so easy and it costs too much time for it.
The most common task with the image is to remove their background so that they can be placed on the other image. It is more challenging. But you also have to do this task for other things, like you are selling some stuff online, making a presentation or even making a college, even when you have to remove the background from the photo or change the background it happens.
Changing the background from an image seems like an impossible task. But is this really impossible?no, at all! You can easily do this work on your Android mobile too. Thankfully, there is an app for Android, which makes this work much easier.Not only this, after removing the unwanted background from the photo, you can also import this photo to other photos using other apps.
background Eraser is a free android app, where you can easily erase unwanted background from your photos and save this transparent image on your phone.
Background Eraser?
To start editing, tap on the “Load Photo” button below.
Now select the photo that you want to edit your mobile.
Crop:
First, crop the unnecessary area and tap the “Done” button above.
Eraser:
With this tool, you can erase unwanted background from your photos. But before you start erasing the background from the photo, set the options below for this tool.
Using the “Cursor Offset” slider, you can adjust the offset (distance) between the touch point and the cursor. With this, when you remove the background from the image on your mobile, your finger will not be in the middle of the photo.
Set the distance between the touch point and cursor by sliding this slider.
B) Cursor Size:
You can only reduce the size of the cursor in “Manual” or “Repair” mode.
The manual size slider will be displayed when you select the mode. By dragging it, you can adjust the size of the cursor more easily.
C) Bgcolor:
Tap on the “bgcolor” button to change the background color of the background color. With this feature, you can check whether the background is successfully erasing or not.
In the same way, select “Auto” mode to remove pixels automatically. In this mode, the part of the image that you will tap on, the color of the part where the color will spread, the part of the automatic will be erased.
If the background color is flat, then this feature is useful.
In this mode, erase the background as much as possible of the image. You can erase the background you have saved in Manual Mode.
Manual Mode:
Tap on the “Manual” button below. Now you will rotate on your image like your finger, that part will be wiped out.
If any part of the image is deleted by mistake, you can tap on the undo button below.
Zoom Mode:
By tapping on the “Zoom” button, you can zoom the image so that the background of the photo can be erased properly.
Repair Mode:
If some part of the image has been accidentally deleted, then you can use it from the Repair mode.
Tap Repair Mode. And move the cursor on the part of the image you want to get back.
Extract Mode:
This mode is a bit difficult to use. Tap on the “Extract” button below.
Tap on the “Keep” button above and mark the part of the image that you want to keep. That area will be marked with blue color.
Now tap on the “Remove” button. Select the part of the image you want to erase, with Red Carmine. Now the unnecessary area will be automatically removed.
Now tap on the “Remove” button. Select the part of the image you want to erase, with Red Carmine. Now the unnecessary area will be automatically removed.
When you completely erase the background of the image, then tap on the “Done” button above.
Smooth Edge:
Even after removing the background from the photo, the corners of the photo remain detent. If the edge of the image is toothed, you can smash the edges of the image from here.
You can select the “+1” or “2” button to increase the smoothing of the edges of the image.
Now save the image by tapping on the “Save” button at the top. This photo will be saved in Eraser folder.
How to use edited images:
You can import photos of this transposed background to other photos. You need to install other apps for this.
m and select your background erased photo.


No comments:
Post a Comment